Cómo talar un árbol de forma segura: técnicas, equipamiento y consejos de expertos
Saltar a la sección
Talar un árbol no consiste simplemente en coger una motosierra y ponerse manos a la obra. Hay que planificarlo con antelación, utilizar el equipo de seguridad adecuado y prestar atención al entorno.
Cada año, más de 36 000 personas sufren lesiones relacionadas con el uso de motosierras. Es una cifra muy elevada, por lo que realmente merece la pena seguir los pasos correctos. Para talar un árbol de forma segura, los propietarios deben examinar primero el árbol y la zona circundante, planificar una vía de evacuación, realizar cortes con cuidado utilizando el equipo adecuado y llevar equipo de protección de principio a fin.
No basta con limitarse a serrar el tronco. Antes incluso de pensar en cortar, comprueba si hay cables aéreos, edificios cercanos y en qué dirección se inclina el árbol.
Esos detalles determinan hacia dónde caerá el árbol… y si deberías siquiera intentar hacerlo tú mismo.
En esta guía se explica lo que necesitas para talar un árbol correctamente. Hablaremos de las herramientas y el equipo de seguridad, de cómo planificar la dirección de la tala, de las técnicas de corte que permiten controlar la caída y de qué hacer una vez que el árbol está en el suelo. También te daremos una idea de cuándo es el momento de recurrir a un profesional.
Herramientas imprescindibles y medidas de seguridad
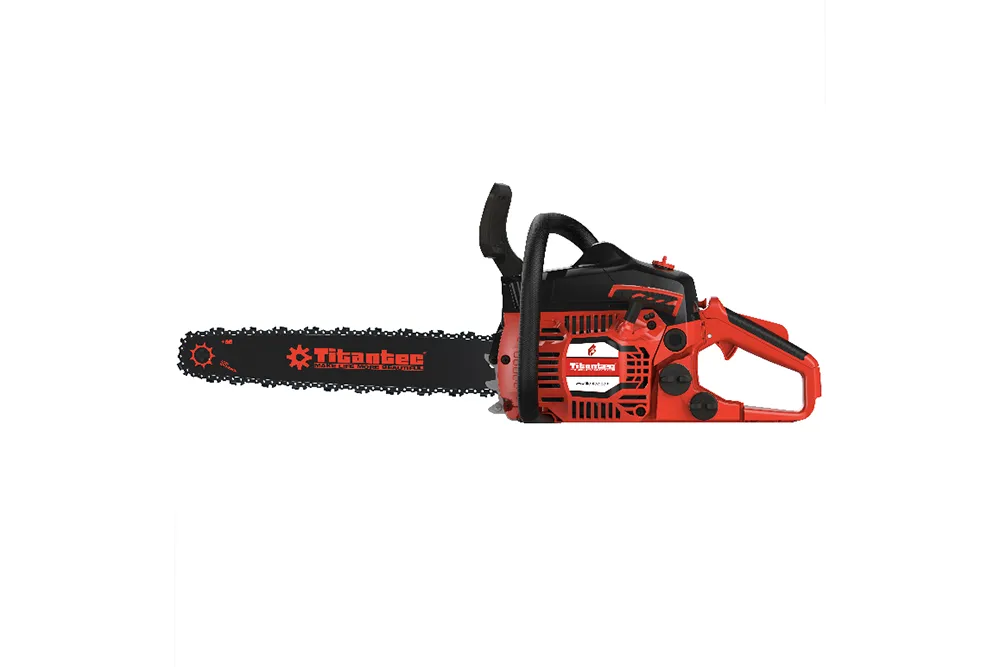
La tala de árboles requiere equipo de protección y herramientas específicas para garantizar tu seguridad. Además, debes conocer la normativa legal antes de empezar, ya que, de lo contrario, podrías ser multado.
Equipo de protección recomendado
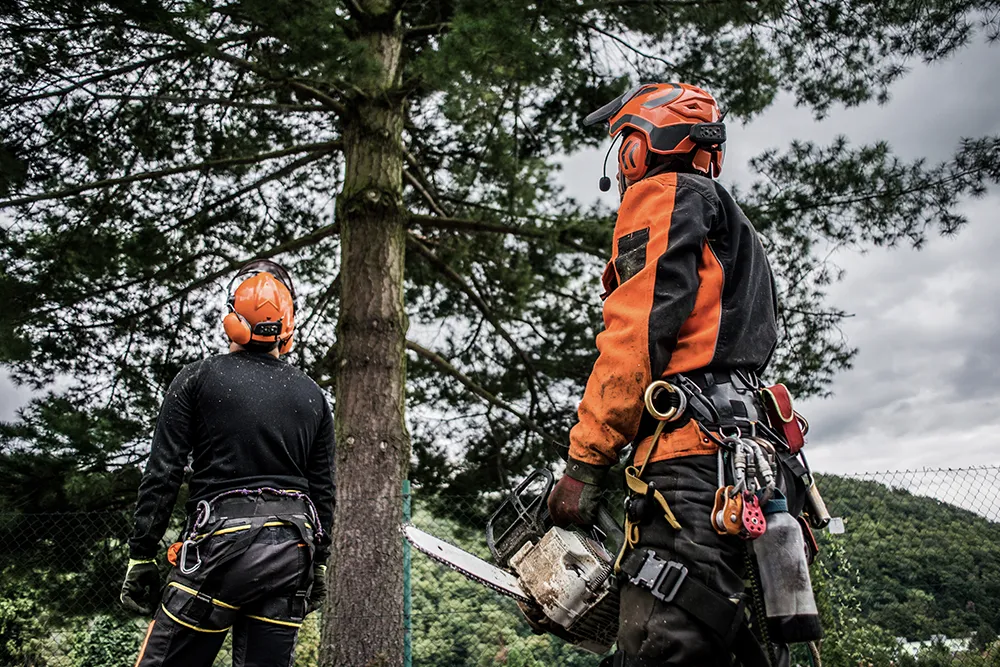
Es imprescindible llevar un casco completo para motosierra con visera y protección auditiva. La caída de ramas provoca muchas lesiones, así que no te saltes este paso.
Los guantes de trabajo protegen las manos de cortes y ampollas. Las botas con puntera de acero protegen los pies de las herramientas que se caen o de una motosierra en marcha.
Las polainas de Kevlar valen cada céntimo que cuestan. Son capaces de detener la hoja giratoria de una motosierra en una fracción de segundo. Las gafas de seguridad o una pantalla facial protegen los ojos de las astillas de madera que salen disparadas.
La ropa de alta visibilidad garantiza que los demás puedan verte mientras trabajas.
Fundamentos de seguridad en el uso de la motosierra
Siempre afilar la cuchilla Antes de empezar. Una cadena afilada corta mejor y ayuda a evitar el retroceso.
Comprueba la tensión de la cadena, el aceite de la barra y los dispositivos de seguridad antes de poner en marcha la sierra. El freno de cadena debe funcionar siempre. Es lo que detiene la cadena al instante si se produce un retroceso.
Sujeta la sierra con ambas manos. Colócate sobre un suelo firme y despejado. Nunca cortes por encima de la altura de los hombros ni desde una posición incómoda.
Añade combustible únicamente cuando el motor esté frío y apagado.
Comprobación de los permisos y aspectos legales
En muchos lugares es necesario obtener un permiso para talar árboles, incluso en tu propio terreno. Llama a la oficina de permisos o a la autoridad urbanística de tu localidad y pregunta qué requisitos hay que cumplir.
Algunos árboles son especies protegidas. No se pueden talar sin un permiso especial, aunque se encuentren en tu propiedad. Los departamentos forestales locales mantienen listas de estos árboles y de los límites de tamaño.
Si el árbol se encuentra en la línea divisoria de la propiedad, necesitarás el consentimiento de tu vecino. Los árboles que se encuentran en la línea divisoria suelen ser de propiedad compartida.
Si hay cables eléctricos cerca, llama primero a la empresa de suministro eléctrico. Normalmente evaluarán la situación y, en ocasiones, se encargarán de retirar el árbol por ti si está cerca de los cables eléctricos.
Evaluación del árbol y planificación de la zona de tala
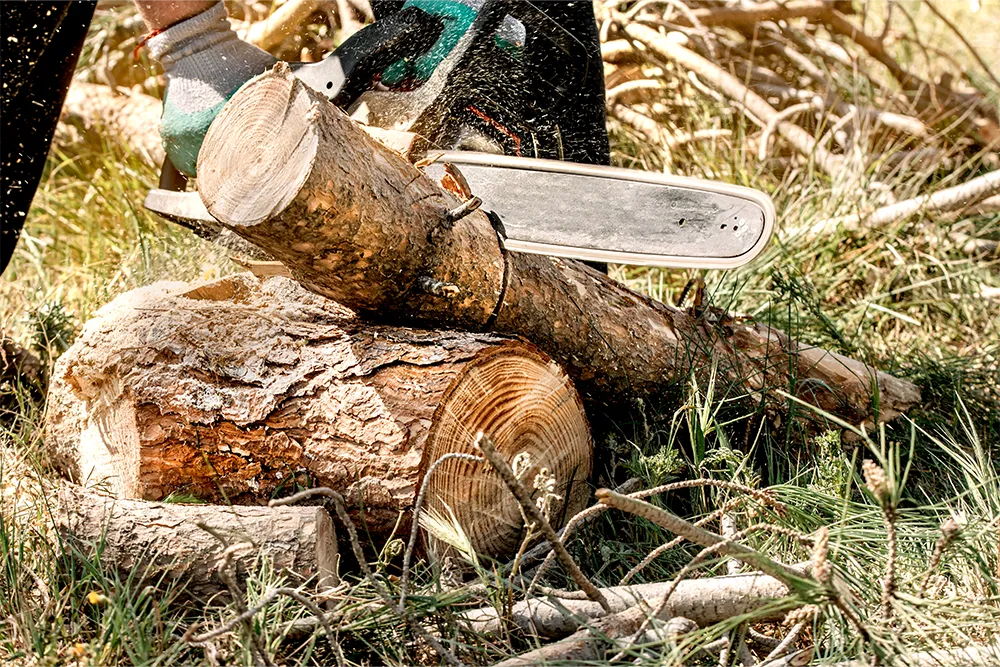
Fíjate en el árbol y en la zona que lo rodea antes de cortarlo. Este paso te ayuda a evitar accidentes y garantiza que el árbol caiga donde tú quieras.
Evaluación del estado de los árboles y de su inclinación
Da una vuelta completa alrededor del árbol. Fíjate si hay grietas, agujeros o ramas secas que puedan romperse.
Los puntos débiles hacen que el árbol sea impredecible.
Averigua hacia qué lado se inclina el árbol. Aléjate un poco y obsérvalo desde varios ángulos. Los árboles que se inclinan hacia delante, hacia atrás o hacia un lado requieren diferentes técnicas de corte.
El peso también influye. Si un lado tiene más ramas, es probable que el árbol se caiga hacia ese lado, aunque el tronco no se incline mucho.
Los árboles muertos o moribundos requieren especial precaución. Es posible que estén huecos por dentro. Da unos golpecitos en el tronco con un mazo para comprobar si hay zonas huecas.
Identificación de riesgos y obstáculos
Retira de la zona de tala cualquier objeto que pueda resultar dañado o provocar lesiones. Asegúrate de que esta zona tenga, como mínimo, el doble de ancho que la altura del árbol.
Peligros aéreos como líneas eléctricas son las más peligrosas. Asume siempre que los cables están bajo tensión hasta que lo sepas con certeza. Presta atención también a las ramas secas, los nidos de insectos y las enredaderas.
Sobre el terreno, mover o proteger:
- Muebles de jardín
- Vallas y otras estructuras
- Árboles o arbustos cercanos
- Rocas y tocones viejos
Presta atención al terreno en sí. Las pendientes influyen en la forma en que cae un árbol. El suelo húmedo puede hacer que las raíces cedan de repente. Si trabajas en una pendiente, resulta más difícil y agotador.
Si hay hiedra venenosa en el tronco, ponte protección adicional. Marca los pozos antiguos, las tuberías o los objetos ocultos para no tropezar con ellos ni golpearte contra ellos.
Señalización de vías de evacuación y caminos despejados
Planifica tu ruta de evacuación antes de empezar. La mayoría de los accidentes durante la tala se producen justo cuando el árbol empieza a moverse, y normalmente a solo unos pocos pies del tocón.
Orienta tu ruta de huida en un ángulo de unos 45 grados respecto a la dirección de la caída. Elige el lado en el que tengas mejor agarre o más espacio.
Para preparar la ruta de evacuación:
- Quita las ramas y cualquier cosa con la que puedas tropezar
- Despeja un camino de al menos 15 pies de largo
- Recórrelo para comprobar si hay tramos con el suelo en mal estado
- Piensa en el movimiento cuesta arriba o cuesta abajo
Asegúrate de que el camino esté totalmente despejado antes de salir. Si el suelo está helado, embarrado o presenta dificultades, calcula un poco más de tiempo. Recorre la ruta a pie para detectar cualquier problema que se te haya podido pasar por alto.
Técnicas de tala controlada
En tres cortes principales colaboran para dirigir la caída del árbol. El corte en muesca señala el árbol, el corte trasero lo publica, y cuñas de tala Te puede servir si necesitas más control.
Cómo planificar el corte en muesca
La muesca determina en qué dirección caerá el árbol. Haz la muesca en el lado que da hacia donde quieras que caiga.
Ajusta la muesca a una altura cómoda, normalmente entre la cintura y los hombros. Así te resultará más fácil trabajar con seguridad. Corta aproximadamente un tercio del tronco.
Hay dos estilos principales de muescas:
- Muesca abierta: ángulo de 70-90 grados
- Muesca convencional: un ángulo de 45 grados y un corte recto
La muesca abierta te ofrece un mayor control. Mantiene el bisagra funciona durante más tiempo a medida que cae el árbol. Apunta la muesca directamente hacia el punto que quieras alcanzar.
Cómo cortar correctamente la muesca
La muesca tiene dos cortes que deben encajar a la perfección. El corte superior forma un ángulo de 45 grados hacia abajo (o más pronunciado en el caso de las muescas abiertas). El corte inferior es recto, en horizontal.
Haz primero el corte en ángulo y, después, el corte horizontal. Si lo haces bien, podrás sacar un trozo en forma de cuña de una sola pieza.
Si la cuña no sale con facilidad, significa que los cortes no están alineados y tendrás que ajustarlos.
Cómo utilizar eficazmente las cuñas de tala
Las cuñas de tala evitan que el árbol aprisione la sierra y ayudan a guiar la caída.
Introduce las cuñas en el corte trasero cuando este tenga la profundidad suficiente para sujetarlas. Lo mejor son las cuñas de plástico: no estropearán la cadena si las golpeas.
Cómo utilizar las cuñas:
- Empieza el corte trasero
- Introduce cuñas cuando el corte tenga una profundidad de entre 2 y 3 pulgadas.
- Golpéalos suavemente para mantener la presión.
- Vete clavándolas cada vez más a medida que avanzas
En el caso de árboles más grandes, utiliza más de una cuña. Colócalas espaciadas a lo largo del corte posterior para que la presión sea uniforme.
Realización del corte trasero y del corte de tala
El corte trasero es el que libera el árbol. Realiza este corte en el lado opuesto a la muesca, unas 2 pulgadas más arriba de la parte inferior de la muesca.
Deja una tira de madera entre el corte trasero y la muesca. Esa será la bisagra; debe medir aproximadamente 10% del diámetro del árbol.
Corta en línea recta, en paralelo a la parte inferior de la muesca. No cortes hasta el final: la bisagra debe permanecer intacta.
Consejos de seguridad:
- Mantén el corte trasero a nivel
- Detente antes de llegar a la bisagra
- Fíjate en cuándo empieza a moverse el árbol
- En cuanto se mueva, utiliza tu vía de evacuación
Cuando el árbol empiece a caer, apaga la sierra y aléjate de allí, con rapidez pero con cuidado.
Limpieza tras la tala y retirada de ramas
Una vez talado el árbol, hay que ocuparse de las ramas y el tronco. En esta fase se producen muchas lesiones, sobre todo debido a la tensión que ejerce la madera.
Poda y eliminación de ramas
Empieza por la base y ve subiendo poco a poco. Así se libera la tensión de forma gradual. Si estás en una pendiente, colócate en el lado que da a la subida.
Pasos para la extirpación de una rama:
- Corta primero las ramas pequeñas por la base
- Pasa a las ramas medianas
- Termina con las ramas más gruesas que hay cerca de la copa
- Aparta de tu camino las ramas cortadas
Ten cuidado con las ramas que estén tensas. Pueden dar un latigazo hacia atrás al cortarlas. En el caso de las ramas realmente grandes, prueba a corte descentrado: corta aproximadamente dos tercios y, a continuación, haz un segundo corte desde abajo, una pulgada más allá del primero.
Prácticas seguras para la poda y el corte de árboles
Bucking consiste en cortar el tronco en trozos más pequeños. La forma de hacerlo depende del tamaño y el peso de cada sección.
En el caso de los troncos pequeños, basta con cortarlos en línea recta desde la parte superior. Para las piezas más grandes, utiliza cortes descentrados: corta dos tercios desde la parte superior y, a continuación, termina desde abajo, desplazando el corte una pulgada. Así evitarás que la sierra se atasque.
Mantén la cadena afilada y bien tensada. Utiliza el freno de cadena al desplazarte entre cortes. No cortes nunca con la punta de la barra: supone un riesgo importante de rebote.
Apila la leña en un lugar seco y ventilado para que no se pudra.
Solución de problemas y cuándo acudir a un profesional
Hay árboles que son demasiado peligrosos para ocuparse de ellos por cuenta propia. Si un árbol se inclina hacia una casa, presenta mucha podredumbre o se encuentra cerca de cables eléctricos, es hora de llamar a un profesional.
Cómo reconocer situaciones peligrosas
Hay varias señales de alerta que indican cuándo es necesario recurrir a un profesional para la tala de un árbol. Si un árbol se inclina más de 15 grados hacia un edificio, una entrada de garaje o una línea eléctrica, los propietarios no deberían intentar ocuparse de ello por su cuenta.
Las líneas eléctricas situadas a menos de 10 pies de un árbol suponen un riesgo real de electrocución. Solo los profesionales autorizados que cuenten con el equipo adecuado deben ocuparse de estas situaciones.
Los árboles muertos o enfermos pueden comportarse de forma impredecible cuando intentas talarlos. A veces, la madera simplemente se desmorona o se parte, por lo que no puedes controlar dónde cae.
Los árboles con más de un tronco o con ramas grandes y pesadas que sobresalen es mejor dejarlos en manos de expertos. Los vientos fuertes, la lluvia o las tormentas no hacen más que aumentar el peligro.
Si hace mal tiempo, es mejor esperar. Los árboles de más de 15 pies de altura o de más de un pie de diámetro suelen requerir equipo profesional y experiencia.
Cómo actuar ante árboles de gran tamaño o en mal estado
Los árboles grandes requieren un equipo de izado especial y grúas de las que la mayoría de la gente no dispone. Los arboristas utilizan cuerdas y poleas para bajar las secciones de forma segura y proteger lo que hay a su alrededor.
Si un árbol tiene el tronco hueco, hongos o grietas grandes, haz que lo revise un experto antes de hacer nada. Estos puntos débiles hacen que el comportamiento del árbol sea difícil de predecir.
A veces, la podredumbre se esconde en lugares donde no se ve. Los expertos saben cómo detectarla.
Cuando los árboles se enredan con otros o se inclinan de forma extraña, hay que talarlos pieza a pieza, empezando por la copa. Este método, denominado tala por secciones, necesita material de escalada y unos conocimientos técnicos reales.
Si existe algún riesgo para las personas o los bienes, lo más sensato es contratar a profesionales para la tala de árboles.
Preguntas frecuentes
¿Qué equipo de seguridad debes llevar puesto antes de talar un árbol?
Lleva un casco con visera para protegerte la cabeza y la cara de ramas que se caen y los restos que salen disparados. Los protectores auditivos protegen tu audición del ruido de la motosierra.
Las polainas para motosierra te ayudan a proteger las piernas en caso de que la cadena se salga. Las botas con puntera de acero protegen los pies y te ayudan a mantener el equilibrio en terrenos irregulares.
Los guantes te proporcionan un mejor agarre y protegen tus manos de astillas y cortes. Mantén todo este equipo puesto desde el primer corte hasta el final de limpieza.
¿Cómo se planifica la dirección de caída y se establecen las vías de evacuación?
Fíjate en la inclinación del árbol y en cómo se distribuye su peso. Elige un lugar de caída en el que no haya edificios, cables ni otros árboles que obstaculicen el camino.
Prepara una vía de evacuación que se aleje entre 15 y 20 pies, formando un ángulo de 45 grados con respecto al lugar donde se prevé que caiga el árbol. Despeja ese camino antes de empezar a cortar: no querrás tropezar con trastos cuando llegue el momento crítico.
El viento y la configuración del terreno también influyen. Tómate un momento para pensar en todo eso antes de elegir la dirección.
¿Cuáles son los pasos principales para realizar correctamente la muesca y el corte trasero?
Empieza por hacer un corte transversal para crear una muesca en el lado hacia el que quieras que caiga el árbol. Haz el corte superior con un ángulo de unos 45 grados y, a continuación, corta en línea recta hasta que se una con él y quitar una cuña.
Ve al otro lado y haz el corte trasero. Este corte debe quedar un poco más arriba que la parte inferior de la muesca y debe ser recto.
Deja aproximadamente una pulgada de madera a modo de bisagra. Esa bisagra ayuda a guiar el árbol mientras cae y te permite controlar un poco el proceso.
¿Cómo se tala un árbol de forma segura en un espacio reducido, cerca de edificios o de líneas eléctricas?
Si estás cerca de edificios o de líneas eléctricas, llama a un profesional. La verdad es que estos trabajos requieren herramientas especiales y conocimientos técnicos que la mayoría de la gente no tiene.
A veces se utilizan cuerdas guía para dirigir el árbol en espacios reducidos, pero los riesgos son elevados. Pedir ayuda es, sencillamente, más seguro.
Es posible que necesites permisos o que tengas que cumplir la normativa local si vas a talar cerca de determinados edificios o árboles protegidos. Vale la pena que lo compruebes antes de empezar.
¿Qué errores habituales hay que evitar al talar un árbol?
Utilizar una motosierra demasiado grande solo sirve para agotarte y aumenta la probabilidad de cometer errores. Para la mayoría de los trabajos de jardinería, una motosierra con una barra de 16 pulgadas es más que suficiente.
Nunca trabajes solo. Contar con un compañero que te vigile puede marcar la diferencia si algo sale mal.
No cortes con la punta de la barra: el contragolpe es muy peligroso. Mantén la cadena afilada y bien tensada, y utiliza siempre las dos manos.
La limpieza también puede ser peligrosa. Un árbol caído puede seguir teniendo tensión en la madera, así que empieza por la parte superior y ve bajando hasta la base, liberando la presión a medida que avanzas.
¿Cómo se debe proceder a la tala de un árbol grande o inclinado para reducir el riesgo?
Los árboles grandes pueden resultar complicados. Requieren técnicas más avanzadas y un equipo de seguridad más adecuado.
Las empresas especializadas en el cuidado de árboles suelen disponer del equipo y los conocimientos técnicos adecuados para árboles más grandes que los que suelen tener la mayoría de los propietarios.
Si un árbol se inclina mucho hacia un lado, podría caer de una forma que no esperas. La inclinación desplaza el peso y hace que sea difícil controlar dónde caerá el árbol.
En este caso, las cuñas de tala resultan muy útiles. Puedes introducir cuñas de plástico o madera en el corte trasero para ayudar a orientar los árboles más grandes y evitar que la sierra se atasque.
¿Quiere saber más sobre nuestros productos?
Ver todos los productos